Tag Archives: installing granite

How Can You Tell Good Quality Granite When Buying Your Countertops?

When you buy granite countertops, you’re making a long-term investment. Due to this, you need to be cautious when making the purchase. To help you out, here is how to tell that you are buying high-quality granite:

Check the thickness of the countertops.

A significant portion of granite’s cost can be attributed to its natural form when taken from the earth. Granite solidifies into enormous slabs. Once harvested, these massive blocks must be transported to a manufacturing plant, where workers chop them into commercially viable pieces.

Many producers cut some parts too thin to maximize their granite yield. When granite is excessively thin, its durability suffers, resulting in poorer-quality granite that scuffs more easily and needs to be replaced years sooner than thicker pieces.

High-quality granite countertops must be 1 to 1 ¼ inches thick. So, you should measure the thickness of your countertops when buying and ensure they are the right size.

Find out the origin of the countertops.

No location can claim a monopoly on the granite industry. It can be found worldwide, from China to Europe and the Americas. Granite’s provenance does not always define its quality. However, the country of origin influences its pricing.

Granite slabs from China, for example, are sold at a lower cost due to reduced labor costs. Higher-cost countries, such as Italy and Brazil, demand more for quality.

In addition to labor costs, shipping charges significantly impact the price of granite. Granite is expensive to transport due to its heavy weight. This means that you can receive the best deal on granite sourced near home.

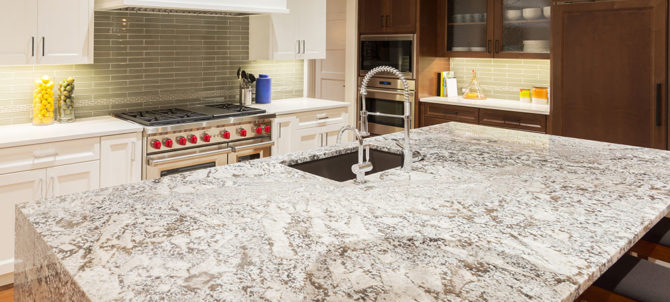
How does the granite look like?

To assess granite quality, you must inspect it closely. Do you notice any dings, dents, scratches, or uneven surfaces?

Any imperfections indicate low-quality granite. Good granite can sustain everyday household use; therefore, if yours has wear and tear, the quality is likely substandard. Also, exercise caution while acquiring any blemished granite. High-quality components are free of scratches and dings.

When making the purchase, look for cracks. Remember that even little fissures can expand into enormous chasms over time, so avoid them.

Determine the porosity of the countertop.

Top-grade granite is resistant to liquid absorption. If a chunk of granite is overly porous and allows liquids to seep inside, it is a low-quality slab with a short lifespan. In addition, extending the life of porous granite necessitates the regular application of costly sealants.

To test porosity, squeeze a drop of lemon juice onto the surface. How long does it take for the granite to absorb the liquid? If it absorbs quickly, the porosity is high, and you don’t want this. Slow or no absorption implies high-quality granite, and this is the one you should get.

Consider the grade of the countertops.

Granite countertops typically come in three grades. Before you spend your hard-earned money, buy the greatest granite for your needs. The primary grades are:

Entry-level granite: This granite is regarded as commercial grade, but it is of lesser quality. Typically, it is thinner than other grades and comes from China.

The granite is strengthened with a cardboard backing. While thinner than the other classes, it is also less expensive, making it a popular apartment option. This granite is available in various attractive colors and is quite durable. It is important to note that it is unsuitable for regularly used rooms.

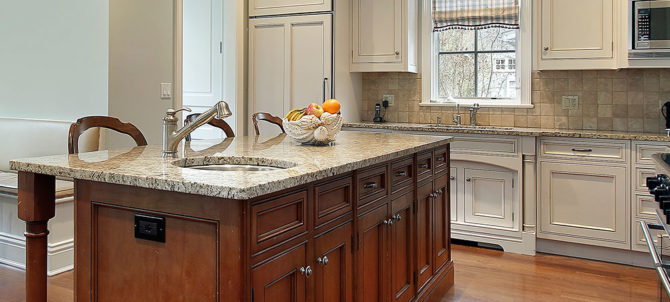
Mid-grade granite: This granite is usually imported from India or Brazil. It is approximately ¾” thick and far more durable than grade 1. This option is most commonly used in homes due to its hardness and lower cost than Grade 3. It comes in a variety of distinctive and striking colors.

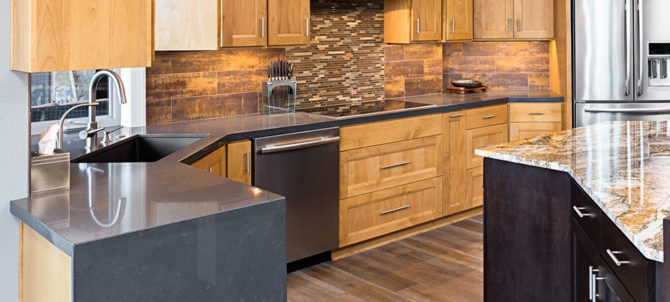
High-grade granite: This granite is the most expensive, ranging between $60 and $100. It is of the highest quality and contains the most unique colors and designs. High-quality granite is widely utilized for kitchen surfaces and around fireplaces.

Assess the polish quality.

The polish quality is critical to ensure you receive a high-grade granite. Low-quality polish will not withstand prolonged use. There are several ways to assess polish quality.

The first option is to use the lemon drop or water test, as described above. This test allows you to examine the porosity and polish quality at the same time.

You can also scratch the surface with a metallic material such as a coin. If the coin leaves a mark, the polishing is poor, and the granite will tarnish soon, and you don’t want this.

Work with a countertop professional.

With a bit of research and effort, you can ensure that you purchase high-quality granite countertops, which most people want.

Many people think they only need the highest-grade countertops, but this isn’t always the case. If a lower grade is appropriate for your needs, go for it.

You only need to ensure that it’s well-made and it will withstand the test of time.

Remember that the countertop industry has plenty of shady people who might try to exploit you.

Simply because you assume you are paying for a high-quality countertop does not imply that you are. Always work with a trustworthy granite countertop dealer to obtain the best value for your money.

Even after installing the countertops, you should note that you must take good care of them. This calls for you to avoid placing hot items on the countertops.

You should also seal the surfaces at least once a year. You can do the sealing yourself, but for the best outcome, let experienced granite contractors Durham help you out.

Can You Install Granite Countertops by Yourself?

Ideally, you should hire granite contractors to install the countertops for you. If you don’t have the money to hire a professional, don’t worry, as with precision and hard work, you can install the countertops by yourself. 

To help you out, here is how to go about the installation:  

Have the necessary tools

Before you choose a granite slab from your preferred home furnishing store, make a list of the installation tools you need for the project and put them in place.

The ones you need include a putty knife, caulking gun, circular saw, measuring tape, jig saw, level, granite dye, masking tape, seam stone, filler, and dry-cut segmented diamond blade.

You use the jig saw to cut out the sink hole (though you may need to hire a professional for this step), use the masking tape to protect the seam lines, the putty knife to mix the seam filler with a dye, and the diamond blade to cut and seam the slab.

You will need a 0.75-inch plywood to brace the top of the cabinet upon which you will install the slab.

Be ultra-cautious when taking the measurements.

Installing a granite slab without determining how much countertop space your kitchen requires is a recipe for disaster.

So, if your granite slab manufacturer refuses to send a specialist to your home to take measurements until you pay an additional fee, you go ahead and take the measurements by yourself. When taking the measurements, be cautious to ensure a flawless job.

For the best outcome, measure the length and width of the top of the counter, which should be done in inches. You should multiply the measured length by 25.5 inches to get the overhang.

The overhang is the legroom required to sit comfortably around the countertop while allowing movement around the kitchen. After multiplying the length of the counter’s top by 25.5 inches, divide the result by 144 to get square footage.

The amount of granite you need for the backsplash should be included in the calculation. This should, of course, be the same length and thickness as the countertop slab, but the height is different.

The backsplash height is typically 4 inches. To convert it to square footage, multiply 4 inches by 144.

Properly prepare the installation area.

Besides having the necessary installation tools, there are several other ways you need to be ready for the installation.

Start by removing the old countertop and plumbing fixtures, level the counter surface, and clear the space around the counter.

Clear the area surrounding the cabinet and remove the old countertop using a nail puller or a screwdriver, depending on how you fastened it. This should expose the counter’s surface for leveling. The purpose of leveling the exposed counter is to maintain stability and facilitate the installation of the new granite slab.

Use plywood and shims for leveling because this is the combination most typically utilized by specialists to obtain professional-level results.

After leveling, turn off the plumbing and uninstall it to avoid an installation disaster. Remember to remove the existing backsplash as well.

Cut the countertop slab with precision.

You can waste a lot of money if you don’t cut the stone as well as it should. To save money, cut a granite slab to fit and look nice after installation.

To ensure that this happens, cut the stone with extreme caution. You will even be better off if you can hire a professional to do it for you.

When doing it, protect yourself from dust by wearing goggles, earplugs, gloves, and respirators. Move all kitchen objects to a location where dust will not settle.

With that out of the way, use a ruler and a marker to create the arrangement of your countertop design. Using a pair of scissors, carefully cut out this layout and pattern.

Following in the footsteps of the Marble specialists, clamp the acquired granite slab with C-clamps and cut it into the pattern in the cardboard using a saw.

Attach the cardboard layout to the granite slab and carefully retrace the design onto the slab to achieve this perfectly.

Sharpen your saw blade and begin cutting the slab along the pattern. You’ll experience heat and pressure growing as you cut.

Control this by having someone on standby to spray water on the granite as you slice it. Also, keep your eyes on the saw while you cut to avoid injury, and remember to take breaks at regular intervals to evaluate your progress.

After cutting, use an angular grinder to smooth the slab’s edges.

Properly seal the seams.

Improperly sealing the joints of your granite countertops means that you will have to deal with cleaning issues, and you don’t want this, do you?

To have an easy time, ensure you get the proper amount and color of professional-grade sealer. If you’re going to build a sealer out of a polyester-based resin, coloring, and hardener, selecting the pigment mix that will make a blend that properly matches the color combination of your granite slab can be difficult.

In this instance, you may require the assistance of a skilled color-matcher.

You should mix the dye with the resin after obtaining your sealer materials until the color matches that of your granite slab and the combination forms putty.

You can experiment with different colors and resin in little amounts until you find the perfect color combination. After that, add your hardener to the putty resin-coloring mixture and thoroughly swirl.

Finally, apply your homemade sealer to the seams and let it harden for up to 24 hours.

Parting shot

These are some of the things you need to do to install granite countertops in your home correctly. As mentioned, you can do the installation yourself, but for the best outcome, let the work be handled by experienced granite countertop installers NC who know what they are doing.  

Marble Alternatives to Consider

As much as marble is beautiful and gives your home an elegant look, it’s not for everyone. If you are looking to install countertops and you don’t like marble countertops, there are plenty of other alternatives you can go with. These alternatives include:

Onyx

On a spiritual level, onyx gives off strong vibrations of energy, protection, and strength, which anyone would like to tap into every morning.

The most popular onyx is black, but this isn’t the only color it comes in—it also comes in a beautiful range of soft neutral, and brighter colors.

As much as onyx is a great marble alternative, you must ask whether it will last for a long time. 

Well, like marble, it should not be installed in highly traffic areas as its porous and fragile. This calls for you to avoid installing shower walls or kitchen countertops, which will likely get stained easily.

If you have to install it in the bathroom, ensure that you do it in the master bathroom, where you will take good care of it. Even when installing it here, ensure that you simply install it as a decorative strip—don’t install it on the floor and shower walls.

Quartzite

You shouldn’t confuse quartzite with quartz as they aren’t similar. 

Like marble, quartzite is highly versatile and can look like almost anything. Designers often use quartzite to get the dramatic look of marble. 

The good thing is that since it is crystalline, its patterns are often softer and more ethereal than most marble types.

Quartzite is more durable than marble, and you can confidently use it as an alternative. The beauty of it is that it combines the beauty of marble with the functionality and durability of granite. Due to this, you can even install it in highly trafficked areas without worrying about it suffering from extensive wear and tear. 

Since it’s made by volcanoes, it’s very strong, doesn’t get stained by citric acids, and can take a lot of heat. Although anyone can install it, it’s most recommended for people who cook a lot and love natural stone.

It comes in a huge range of colors and patterns, so you have plenty of options. 

Soapstone

If you are looking to replace your black kitchen countertops with something other than marble, you might want to think about soapstone.

Soapstone is an excellent alternative because it can handle heat. It comes in different colors that range from dark green to charcoal to black, and its face has a lot of movement.

Since it’s non-porous, you don’t have to worry about it getting stained or damaged by water.

If you are thinking about installing soapstone countertops, there are some things you should know. 

One of the things you should know is that soapstone gets a natural patina as you use it. To ensure that it wears out evenly, it’s recommended that you oil it regularly.  

It’s also hard to find it in large slabs, so you need to work with your contractors and assemble smaller pieces to get the large countertops you are after. 

Granite

Granite is not an unusual material to find in a kitchen. In fact, it has been one of the most popular natural stone countertop materials for a long time. 

But this has both pros and cons. Since the 1970s, granite has been a popular choice for surfaces. As a result, many people have granite countertops Raleigh that are so old that they don’t look good in a modern kitchen.

Granite comes in many styles, some of which look like marble. It even comes in creative colors.

Granite is much stronger than marble and less likely to break or chip. It’s also much less likely to get stained.

Parting shot

These are some of the options you have when it comes to marble alternatives. When choosing the options, choose those that will give you the service you are after.

For example, if you are looking to install a countertop in a highly trafficked area, you should stay away from onyx or soapstone and instead go for granite or any other tougher material. 

How To Deal With Common Countertop Problems

Both bathroom and kitchen countertops develop a myriad of issues that you have to deal with to keep the countertops in top shape. Which are these issues?

Cracked countertop surfaces

The countertop will crack due to various reasons such as imperfectly shaped joints, installing the countertops on uneven surfaces, and placing excessive weight on the surfaces.

How you fix the countertops depends on the nature of the cracks. If you have small cracks, repair them using epoxy resin. For deeper cracks or damage brought about by placing excessive weight on the countertops, replace the damaged part using a drill before applying a special filler.

When choosing filler, choose one that flawlessly mixes with your countertops. If this is the first time you are doing it, you will most likely get it wrong, so it’s best to have the work done by a professional.

Scratches and chips on the countertop surface

When you routinely place blades, containers, and other utensils on the countertops, you are bound to cause scratches and chips.

If you have covered countertops, you can easily fill the cuts or scratches using a repair pen or paste. Remember to fill exactly in the respective marks and avoid overfilling or underfilling as you will have a problem removing the filler later on.

For the best outcome in removing the chips or scratches from the countertops, you have to follow the right procedure.

Begin with applying concealing tape over the encompassing shelf space to leave the damaged area uncovered. Using an extremely sharp edge, rub off the excess filler to achieve a smooth wrap-up.

You should then place a piece of clear tape over the recently filled chipped surface to power the gun further into the chip to have a more solid seal.

Finally, mix an epoxy pitch with the fading shading colors to match your granite color.

Dull countertops and chemical stains

Your countertops will get dull due to you using the wrong cleaning products. Thankfully you can brighten them using one part isopropyl alcohol and three parts water, and a few drops of dishwashing liquid.

If there are steaks on your countertops, remove them by spraying a solution of equal parts white vinegar and water.

Are there coffee, grape juice, or wine stains on your surfaces? Remove them with a solution of equal parts hydrogen peroxide and water.

Once you are done, you should wipe and buff the surfaces with newspaper until they are dry.

To prevent your countertops from getting dull again, don’t use abrasive cleaners or abrasive pads, as these cleaners will remove the finish, leaving your countertops dull and unattractive.

Never use acidic cleaners such as vinegar or lemon juice on your surfaces.

Also, stay away from ammonia-based cleaners. To prevent stains, wipe the spills immediately.

If you are using a commercial countertop polish or cleaner, ensure that it’s specially designed for the countertops in question, so they aren’t damaged.

As a rule of thumb, never set hot pots and pans on your countertops as you will damage them. Use trivets at all times.

Stains on the countertops due to hot pots and pans

Even the porous countertops are designed to withstand high temperatures, unfortunately, when you keep exposing your surfaces to the high temperatures, they are bound to get damaged.

Due to the high temperatures, giving your surfaces an ugly look.

To remove the stains, you need to apply some lemon juice on the stain, then leave it to dry for 5-10 minutes. You should then apply a layer of toothpaste to the surface using a rubber spatula then use a soft-bristled brush or toothbrush to scrub the stain.

Once the stain goes away, wipe the surfaces and clean them with a crisply wet towel.

Parting shot

Whether you have marble, wooden, or granite countertops Raleigh, your countertops will develop problems that you need to fix to restore sanity. You can fix some of the problems by yourself but if some of the issues are complex such as large cracks on the surfaces, let an experienced professional help you out.

As a rule of thumb, never try to fix a problem you don’t understand as you will cause more problems than were originally there.

4 Disadvantages of Granite Countertops

Granite counters are undoubtedly the most popular countertop materials, and every new homeowner dreams of installing them in their home. Unfortunately, it’s not all hunky dory as the countertops have their flaws. Is this your first time you are thinking about installing the countertops? Here are 4 disadvantages of granite countertops you should know about:

They are highly inconsistent.

The countertops are natural, so you can’t expect them to be the same but granite takes the inconsistency to a whole new level.

First, what is referred to as granite in the stone yard and what you purchase for your kitchen isn’t always granite. Many stones are referred to as commercial granite. Meaning a group of stones quarried for use on countertops and share similar characteristics such as high levels of mica, quartz, silica, and feldspar.

True granite is made through volcanic activity where the molten rock cools beneath the earth’s surface. In some cases, the stones labeled and sold as granite aren’t actually igneous rock. Some are dolomites, breccias, and conglomerate stones. All of which are metamorphic or sedimentary rocks.

The granite’s significant inconsistencies mean that there is no standard hardness value, grading, durability, or maintenance. The inconsistency also means that you sometimes have stones that are porous, weak, soft, and others that are so dense such that even thinking about sealing them is wrong.

When you are in the stores making the purchase, all commercial granite is sold and treated equally, so it’s hard to tell what you are buying. Due to this, it becomes an issue of luck. You can buy a soft, weak stone or a tough one that will last your entire lifetime.

To increase your chances of buying a high-quality stone, involve experts. As you are doing your shopping, hire a granite contractor to accompany you to the stores. The contractor will help you determine how strong the countertop is and when it comes to the granite installation, you won’t waste time finding another installer.

Granite counters have plenty of fissures and pits

Since it’s natural, granite tends to have plenty of natural fissures or pits on its surface. Some of the fissures are harmless, cosmetic cracks or small indentations in the stone, but others are lethal and could actually weaken the countertops’ structure and integrity.

If you are wondering what fissures and pits are, fissures are natural cracks that occur on the stone, and they often occur where two minerals meet. On the other hand, Pits are small holes or indentations in the stone, which often come about when a weaker particle breaks free.

In most cases, it’s hard to tell the nature of a fissure until it opens up or forms a wider crack. Even professionals can’t tell whether the fissure or pit will worsen with time.

Thankfully, most companies apply a resin that makes the countertops stronger and hides the fissures. This means that when you polish the countertop, you cause the light to bounce off the countertop, which comes in handy at hiding the fissures, pits, and other imperfections.

The countertops come with too many color variations

Although the color variations might be a plus for some people as it means more countertop options to choose from, it can be a negative if one section of the stone is significantly different from the rest. Or you have a countertop that has a significant shift in color or pattern from one end of the stone to the next.

Due to the color variations, you should be ultra-cautious when purchasing as the color might look great at the store but be awful when you bring it home.

Before you commit to buying large countertop slabs, first carry a small sample to your home and see how the slab looks in the house. Only proceed with the purchase if you like how the countertop looks.

The countertops don’t have the same durability.

Make no mistake about it. Some granite counters are incredibly durable and will even last several generations, but others, such as those shipped from China, are weak and won’t last long enough. In fact, these stones will sag over time if you don’t support them.

To extend the life of the kitchen countertops Durham, support them on the kitchen islands, overhangs, desk, and other areas.

Can You Replace Kitchen Countertops Without Damaging Cabinets?

Many homeowners will simultaneously replace their countertops and cabinets, but if you don’t have a huge budget, you can replace them without replacing the cabinets.

While many homeowners replace the cabinets and countertops simultaneously, as they want a uniform look, others do it as they deem the cabinets will get damaged when replacing the countertops.  Can you replace kitchen countertops without damaging cabinets? Yes, you can. You only need to be cautious about how you remove and install the countertops.

To help you out, here are the steps to follow when removing the old countertops:

Step 1: Remove everything from the countertops

This is a no brainer as there is no way you can remove the countertops with items still on them, can you? So remove appliances, books, cutlery and any other thing from the countertops. You also should take everything from the drawers and in the cabinets underneath the countertops and place the items in a safe place away from the area you are working in.

Step 2: Disconnect the supply lines.

Once everything is out of the way, shut off the supply lines to the countertop fixtures. These include the water and gas lines to the stovetop. For the drain line, use an adjustable wrench to loosen the large nuts holding the U or J-shaped trap to the sink’s main drain line. If you have a PVC connection, you should be able to loosen the connection by hand.

For the supply lines, turn off the valves for each fixture clockwise to the off position, then disconnect the lines from the valves using an adjustable wrench.

Step 3: Remove the sink

Depending on the type of sink you have, you should proceed to remove it from your countertops. If you have a drop-in fixture sink, use a putty knife or chisel to pry the sink away from your countertop. You will need to chop away at the layer of dried adhesive under the sink rim to free it.

If the sink is fastened to a tile countertop, you will need to chisel away the quarter tiles along the sink’s perimeter. Remember to remove any remaining mortar or adhesive with a caulk remover or chisel.

Do you have an under-mount sink? Unfasten the screws holding it to the countertop and remove the brackets underneath the sink. Using a flat chisel, remove the caulk acting as a seal between the countertop and sink. After you have freed the sink from the counter, it should come out easily, and all you need is to ask someone to help you pull it out, especially if it has an unwieldy double bowl configuration.

Step 4: Remove the countertops

With everything out of the way, now it’s time to get down to removing the countertops. Begin with loosening the adhesive holding the countertops in place. All you need to do is spray the adhesive with a caulk softener, then let the softener sit on the surface for one hour, then pry the adhesive away from the backsplash with a putty knife and workaround until the counter is loose enough to lift.

If your countertops are held into place by screws, unfasten them, then lift the countertop.

Step 5: Remove the countertops from the cabinets

Most countertops are bracketed to the base cabinets but if yours are attached to the base with nails or an adhesive, use a pry bar to remove them. Work slowly around the countertop and only use minimum force to avoid damaging the base cabinets.

Once the countertop is detached from the cabinets, use a flat chisel to remove the tiles from the countertop surface. Doing this frees the countertop and reduces the weight, making it easy to lift out. Once you have removed all the tiles, get in touch with granite contractors to remove the slab. Don’t try to remove the countertops by yourself, as you risk damaging the cabinets due to the heavyweight.

Step 6: Install new countertops.

Once the old countertop is out of the way, now it’s time to install the new countertop. Work with experienced countertop replacement NC professionals and professionally install the new countertops.