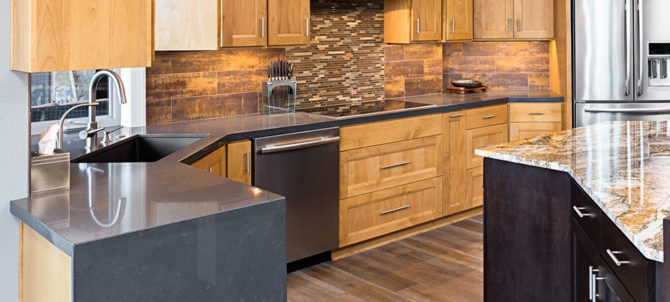
Many homeowners will simultaneously replace their countertops and cabinets, but if you don’t have a huge budget, you can replace them without replacing the cabinets.
While many homeowners replace the cabinets and countertops simultaneously, as they want a uniform look, others do it as they deem the cabinets will get damaged when replacing the countertops. Can you replace kitchen countertops without damaging cabinets? Yes, you can. You only need to be cautious about how you remove and install the countertops.
To help you out, here are the steps to follow when removing the old countertops:
Step 1: Remove everything from the countertops
This is a no brainer as there is no way you can remove the countertops with items still on them, can you? So remove appliances, books, cutlery and any other thing from the countertops. You also should take everything from the drawers and in the cabinets underneath the countertops and place the items in a safe place away from the area you are working in.
Step 2: Disconnect the supply lines.
Once everything is out of the way, shut off the supply lines to the countertop fixtures. These include the water and gas lines to the stovetop. For the drain line, use an adjustable wrench to loosen the large nuts holding the U or J-shaped trap to the sink’s main drain line. If you have a PVC connection, you should be able to loosen the connection by hand.
For the supply lines, turn off the valves for each fixture clockwise to the off position, then disconnect the lines from the valves using an adjustable wrench.
Step 3: Remove the sink
Depending on the type of sink you have, you should proceed to remove it from your countertops. If you have a drop-in fixture sink, use a putty knife or chisel to pry the sink away from your countertop. You will need to chop away at the layer of dried adhesive under the sink rim to free it.
If the sink is fastened to a tile countertop, you will need to chisel away the quarter tiles along the sink’s perimeter. Remember to remove any remaining mortar or adhesive with a caulk remover or chisel.
Do you have an under-mount sink? Unfasten the screws holding it to the countertop and remove the brackets underneath the sink. Using a flat chisel, remove the caulk acting as a seal between the countertop and sink. After you have freed the sink from the counter, it should come out easily, and all you need is to ask someone to help you pull it out, especially if it has an unwieldy double bowl configuration.
Step 4: Remove the countertops
With everything out of the way, now it’s time to get down to removing the countertops. Begin with loosening the adhesive holding the countertops in place. All you need to do is spray the adhesive with a caulk softener, then let the softener sit on the surface for one hour, then pry the adhesive away from the backsplash with a putty knife and workaround until the counter is loose enough to lift.
If your countertops are held into place by screws, unfasten them, then lift the countertop.
Step 5: Remove the countertops from the cabinets
Most countertops are bracketed to the base cabinets but if yours are attached to the base with nails or an adhesive, use a pry bar to remove them. Work slowly around the countertop and only use minimum force to avoid damaging the base cabinets.
Once the countertop is detached from the cabinets, use a flat chisel to remove the tiles from the countertop surface. Doing this frees the countertop and reduces the weight, making it easy to lift out. Once you have removed all the tiles, get in touch with granite contractors to remove the slab. Don’t try to remove the countertops by yourself, as you risk damaging the cabinets due to the heavyweight.
Step 6: Install new countertops.
Once the old countertop is out of the way, now it’s time to install the new countertop. Work with experienced countertop replacement NC professionals and professionally install the new countertops.