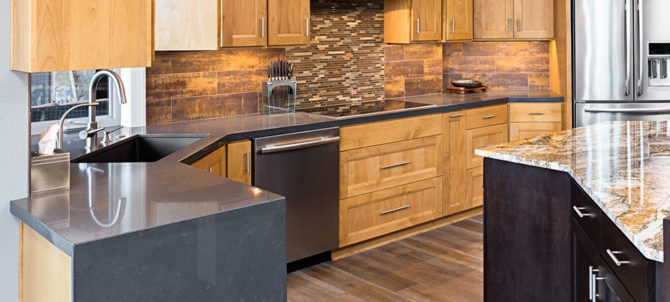
Ideally, you should hire granite contractors to install the countertops for you. If you don’t have the money to hire a professional, don’t worry, as with precision and hard work, you can install the countertops by yourself.
To help you out, here is how to go about the installation:
Have the necessary tools
Before you choose a granite slab from your preferred home furnishing store, make a list of the installation tools you need for the project and put them in place.
The ones you need include a putty knife, caulking gun, circular saw, measuring tape, jig saw, level, granite dye, masking tape, seam stone, filler, and dry-cut segmented diamond blade.
You use the jig saw to cut out the sink hole (though you may need to hire a professional for this step), use the masking tape to protect the seam lines, the putty knife to mix the seam filler with a dye, and the diamond blade to cut and seam the slab.
You will need a 0.75-inch plywood to brace the top of the cabinet upon which you will install the slab.
Be ultra-cautious when taking the measurements.
Installing a granite slab without determining how much countertop space your kitchen requires is a recipe for disaster.
So, if your granite slab manufacturer refuses to send a specialist to your home to take measurements until you pay an additional fee, you go ahead and take the measurements by yourself. When taking the measurements, be cautious to ensure a flawless job.
For the best outcome, measure the length and width of the top of the counter, which should be done in inches. You should multiply the measured length by 25.5 inches to get the overhang.
The overhang is the legroom required to sit comfortably around the countertop while allowing movement around the kitchen. After multiplying the length of the counter’s top by 25.5 inches, divide the result by 144 to get square footage.
The amount of granite you need for the backsplash should be included in the calculation. This should, of course, be the same length and thickness as the countertop slab, but the height is different.
The backsplash height is typically 4 inches. To convert it to square footage, multiply 4 inches by 144.
Properly prepare the installation area.
Besides having the necessary installation tools, there are several other ways you need to be ready for the installation.
Start by removing the old countertop and plumbing fixtures, level the counter surface, and clear the space around the counter.
Clear the area surrounding the cabinet and remove the old countertop using a nail puller or a screwdriver, depending on how you fastened it. This should expose the counter’s surface for leveling. The purpose of leveling the exposed counter is to maintain stability and facilitate the installation of the new granite slab.
Use plywood and shims for leveling because this is the combination most typically utilized by specialists to obtain professional-level results.
After leveling, turn off the plumbing and uninstall it to avoid an installation disaster. Remember to remove the existing backsplash as well.
Cut the countertop slab with precision.
You can waste a lot of money if you don’t cut the stone as well as it should. To save money, cut a granite slab to fit and look nice after installation.
To ensure that this happens, cut the stone with extreme caution. You will even be better off if you can hire a professional to do it for you.
When doing it, protect yourself from dust by wearing goggles, earplugs, gloves, and respirators. Move all kitchen objects to a location where dust will not settle.
With that out of the way, use a ruler and a marker to create the arrangement of your countertop design. Using a pair of scissors, carefully cut out this layout and pattern.
Following in the footsteps of the Marble specialists, clamp the acquired granite slab with C-clamps and cut it into the pattern in the cardboard using a saw.
Attach the cardboard layout to the granite slab and carefully retrace the design onto the slab to achieve this perfectly.
Sharpen your saw blade and begin cutting the slab along the pattern. You’ll experience heat and pressure growing as you cut.
Control this by having someone on standby to spray water on the granite as you slice it. Also, keep your eyes on the saw while you cut to avoid injury, and remember to take breaks at regular intervals to evaluate your progress.
After cutting, use an angular grinder to smooth the slab’s edges.
Properly seal the seams.
Improperly sealing the joints of your granite countertops means that you will have to deal with cleaning issues, and you don’t want this, do you?
To have an easy time, ensure you get the proper amount and color of professional-grade sealer. If you’re going to build a sealer out of a polyester-based resin, coloring, and hardener, selecting the pigment mix that will make a blend that properly matches the color combination of your granite slab can be difficult.
In this instance, you may require the assistance of a skilled color-matcher.
You should mix the dye with the resin after obtaining your sealer materials until the color matches that of your granite slab and the combination forms putty.
You can experiment with different colors and resin in little amounts until you find the perfect color combination. After that, add your hardener to the putty resin-coloring mixture and thoroughly swirl.
Finally, apply your homemade sealer to the seams and let it harden for up to 24 hours.
Parting shot
These are some of the things you need to do to install granite countertops in your home correctly. As mentioned, you can do the installation yourself, but for the best outcome, let the work be handled by experienced granite countertop installers NC who know what they are doing.